Selecting a messaging audience
We’ve found that the more you segment based on what your users are interested in (that is, showing them a sale on sandals when they’ve told you they’re interested in footwear), the higher the return and conversion rate.
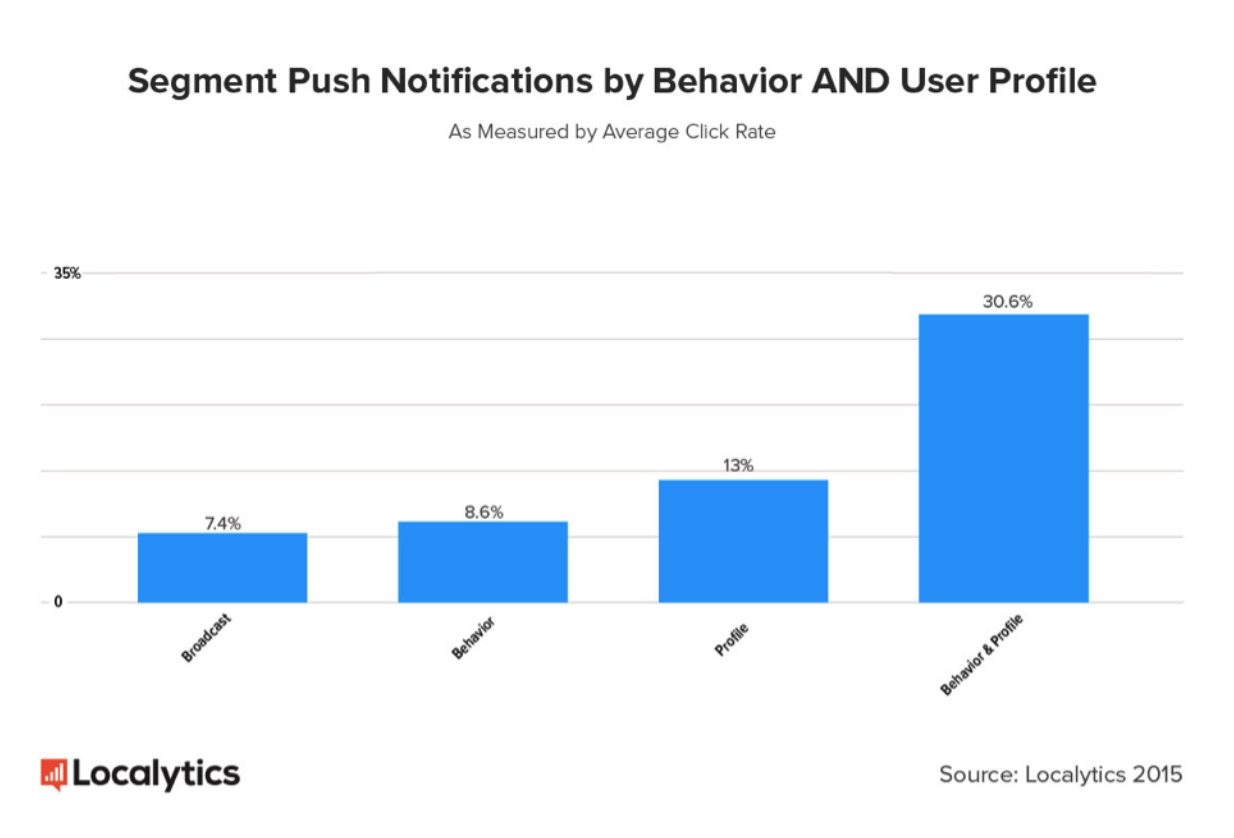
Segmenting your users into an audience allows you to message them about topics they’re interested in. This ultimately gets your message to the right users at the right time.
Selecting an audience
After you’ve chosen a goal for your message, you’ll need to select an audience. Like choosing a goal, selecting your audience is the same no matter what type of message you’re sending.
Note: If you’re sending a places (geopush) message, choosing an audience just specifies who will be able to receive the message. You’ll pick the locations after you build your message.
You have three options for the audience who will receive the message:
For each option, you see an estimate for how many users will receive your message. Keep in mind, this might not 100% align with the total number of users who end up actually receiving it. There are a lot of different factors that would change this number. For more information on this variance, see Why is the estimated audience size different than the number of messages sent?
Tip: Enable a control group to hold back your message from a percentage of the audience (usually 5%). This way, you can measure the effectiveness of your message by comparing the results from users who received the message with those who did not. For more information, see A/B testing basics.
Everyone
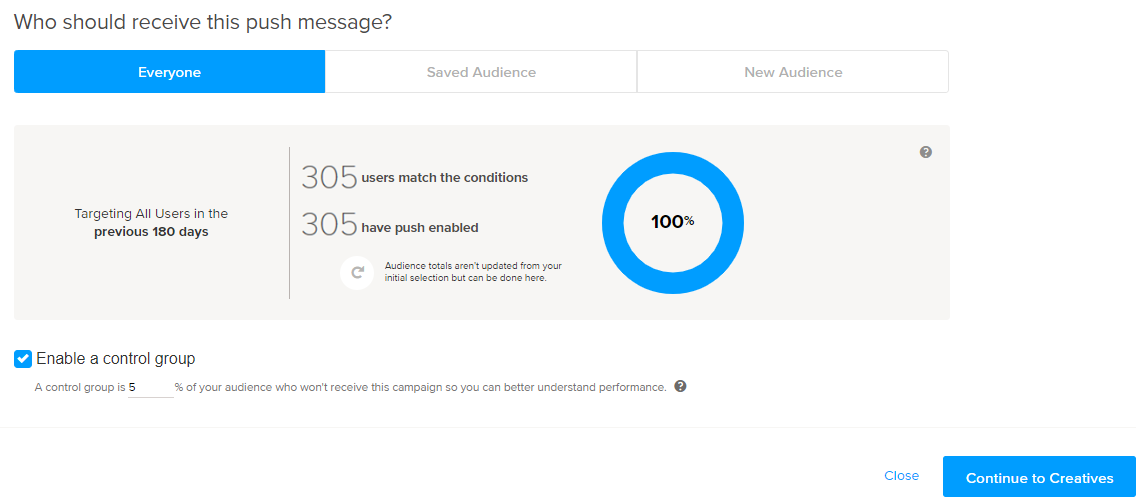
Sending a message to everyone means it will be sent to all of your users who qualify to receive the message (that is, we can’t send messages to users who have opted out of push messages).
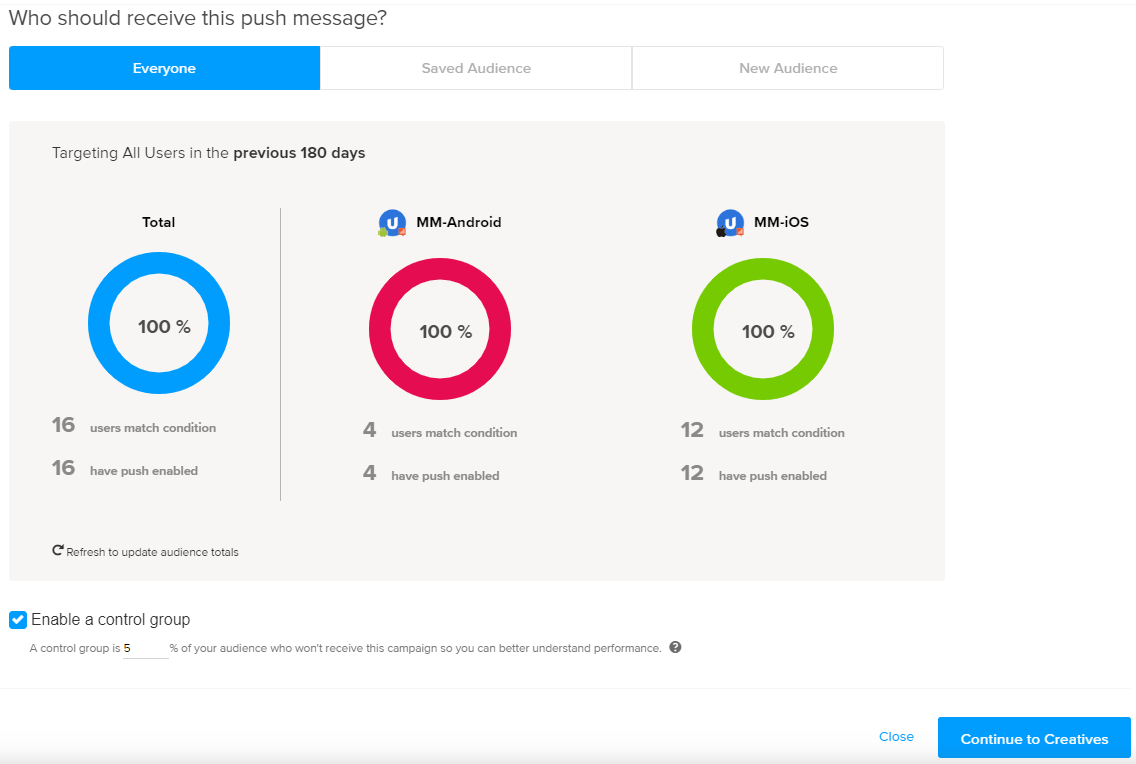
If you are working with push messaging across Android and iOS apps, you see three columns: total number of users in the audience, total number of  (Android) users, and total number of
  (iOS) users.
Note: You’ll be able to schedule your message later, when you can choose to deliver the message based on the user’s time zone.
Select this type of audience if you need to get information out to everyone—for example, when you are sending breaking news or alerting users to an app update.
When you are done, you are ready to continue to creatives for your message type.
Saved audience
You can send your push message to a defined group of users: an audience.
If you’ve already defined an audience within your dashboard, select Saved Audience.
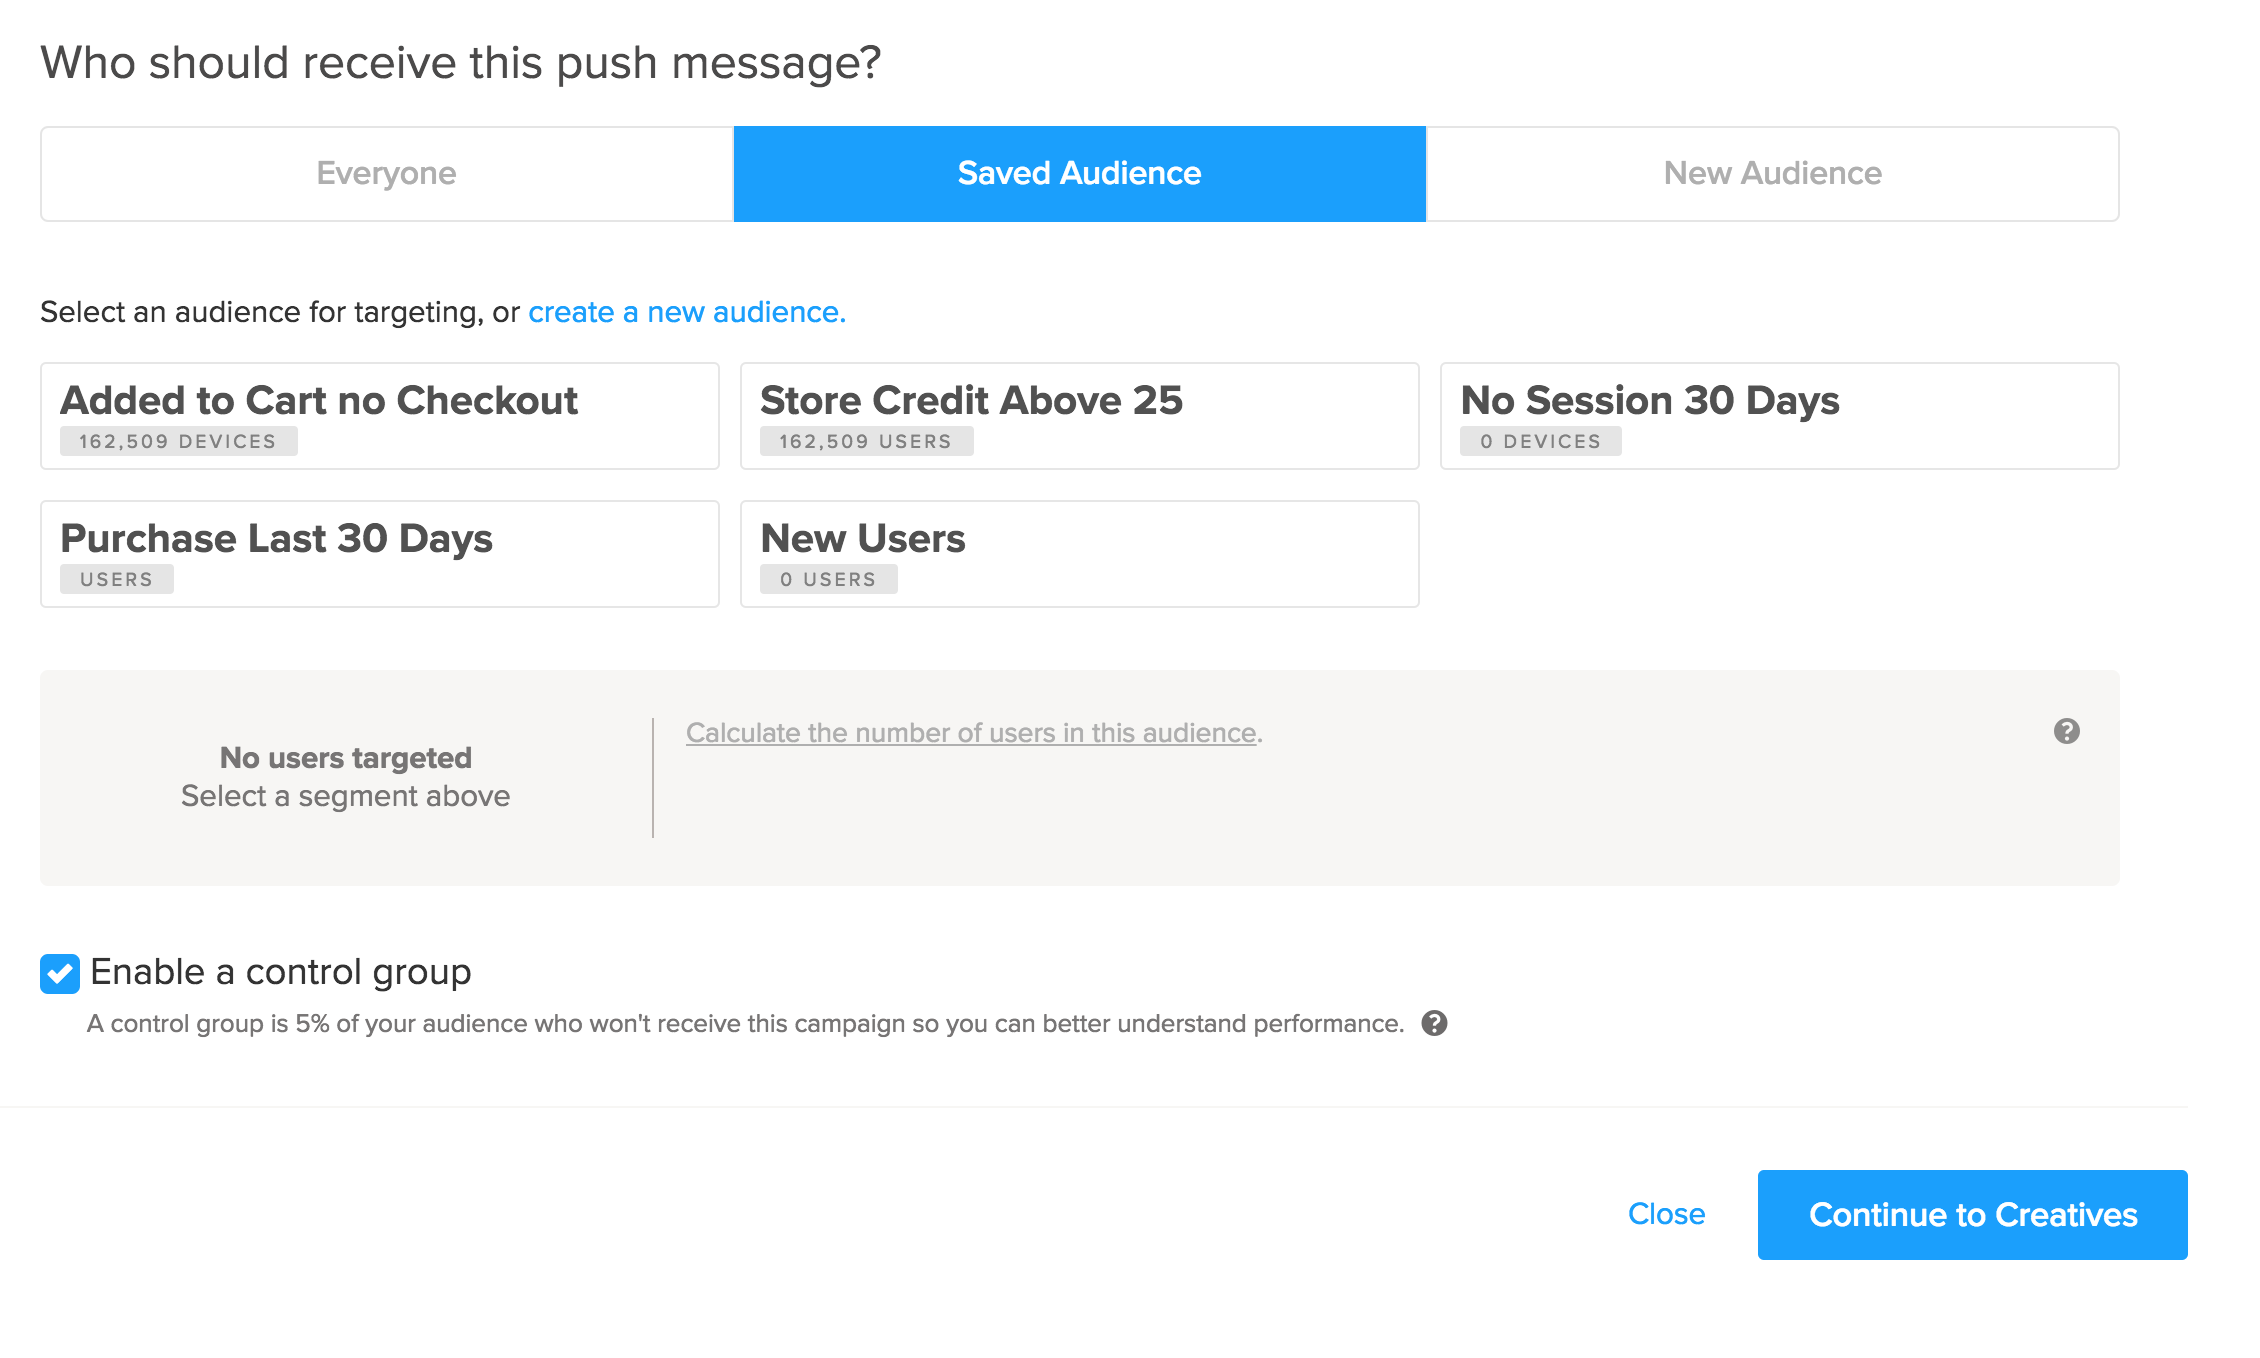
If you are working with push messaging across Android and iOS apps, the page is divided into two sections, headed by the  (Android) and
  (iOS) icons. For each app, select an existing audience from the drop-down list next to its icon. You can search to locate the saved audience. You can also enable a control group for each app separately.
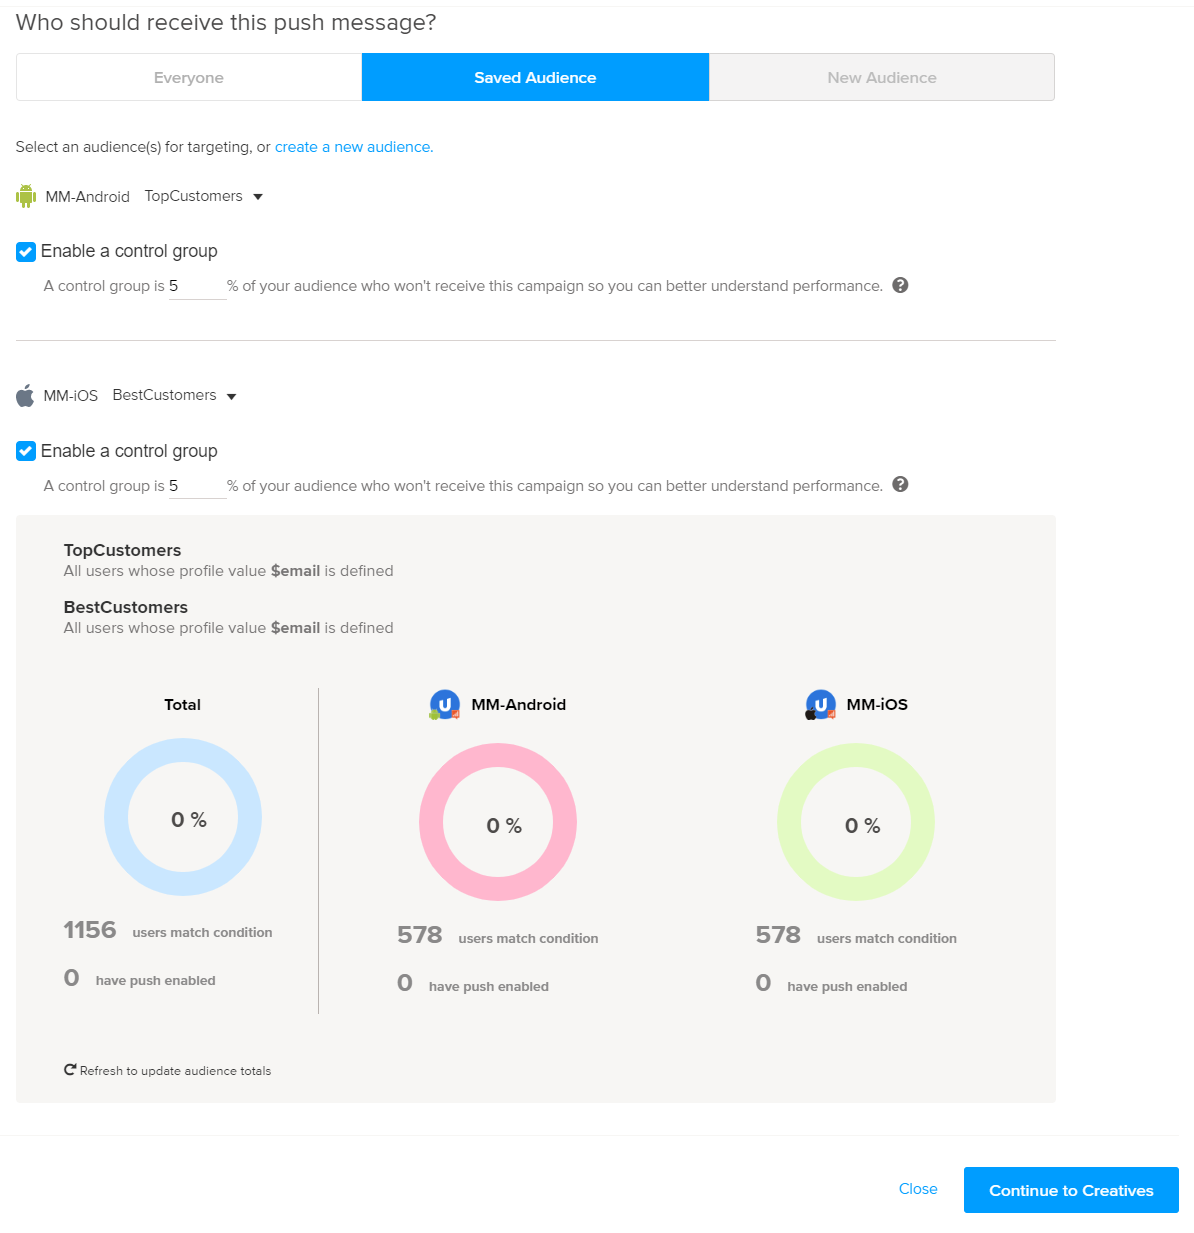
When you are done, you are ready to continue to creatives for your message type.
New audience
If you’d prefer to build an audience from within your message workflow, select New Audience.
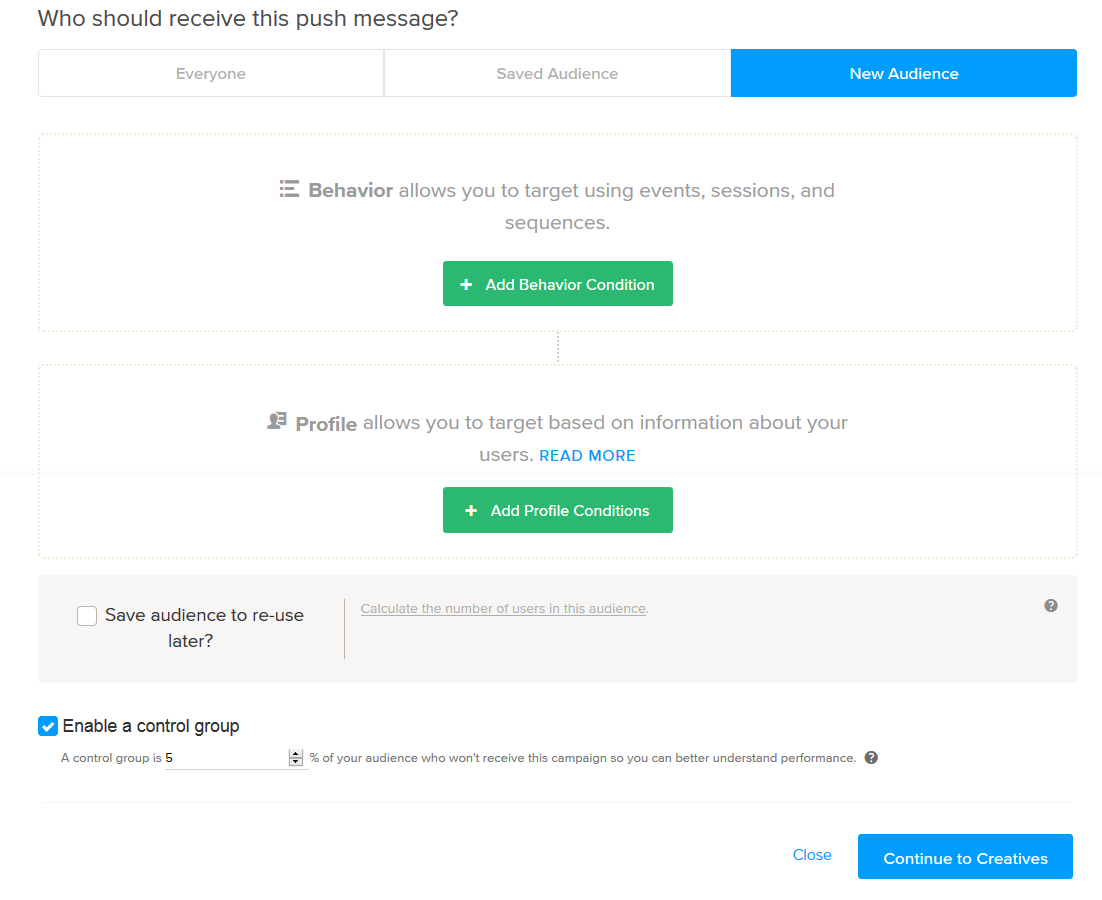
Note: If you are working with push messaging across Android and iOS apps, you see a message that new audience capabilities for cross-app campaigns are coming soon. Select Everyone or Saved Audience instead.
For more information, see Building an audience.
When you are done, you are ready to continue to creatives for your message type.
Continuing to Creatives
When you are done, select Continue to Creatives, where you will craft your message.
The workflows are different for each message type: